
最近、ジェルネイルで主流になりつつあるピールオフベースジェル。
みなさんも使っていますか?
 🔰羊さん
🔰羊さんいえ、まだです。ネイルの持ちが心配です。
 物知りウサギ
ピールオフジェルでも1〜2週間は大丈夫ですし、
ジェルオフが本当に楽です♪
なので今回は、ピールオフジェルを長持ちさせる方法をご紹介します。
この記事を読んでもらえば、
- ピールオフを使うメリット
- ピールオフジェルのやり方
- ピールオフの長持ちする方法
- ピールオフのジェルオフの方法
- おすすめのピールオフ
ピールオフジェルについてわかります。
🔰羊さんピールオフジェル、
気になります。
物知りウサギぜひ最後まで読んでくださいね。
そもそもピールオフジェルとは?
ピールオフジェルとは、
アセトンなどを使わないではがせるベースジェルです。
🔰羊さんアセトンなしで
オフ出来るんですか?
物知りウサギそうです。
いろんなメリットがあります。
アセトンのジェルオフをしなくて良い!
ジェルネイルで1番の面倒と言えば、やっぱりジェルネイルオフではないでしょうか?
アセトン溶剤を用意したり、つけ置きのための準備などが必要です。
またジェルを落とすのに時間がかかりますよね。????
ピールオフの場合、今までのジェルオフのような準備と時間がかかりません!
しかも、アセトン溶剤の爪へのダメージが無くなるのが大きなメリットです。
いつでも気軽にオフ出来る!
「お休みの時だけネイルしたい!」
っていう方にもおすすめなのが、このオフの手軽さ。
イメージとしては、
しっかりとくっついたネイルチップです。
ジェルと自爪の間に空気を入れると、パカッと綺麗に取れます。
🔰羊さんコレなら楽ですね♪
物知りウサギただし、無理にはがすのはダメです。
後ほどオフの方法もご紹介します。
持っているジェルはそのまま使える!
ピールオフジェルは、持っているカラージェルやトップジェルなど
そのまま使う事ができます。
なので、
ピールオフジェルを購入するだけでジェルオフが簡単になります。
ピールオフジェルのやり方は?

ピールオフジェルのやり方は、とっても簡単です。
普段つかうベースジェルを塗るのをピールオフジェルに変えるだけです。
ジェルを塗る前にネイルケアをする。
ジェルを塗る前にはネイルケアをします。
ネイルを長持ちさせる方法の1つですが、それ以外にネイルの出来も良くなります。
物知りウサギガーゼで甘皮ケアをする時は
使い捨てのおしぼりがおすすめです。

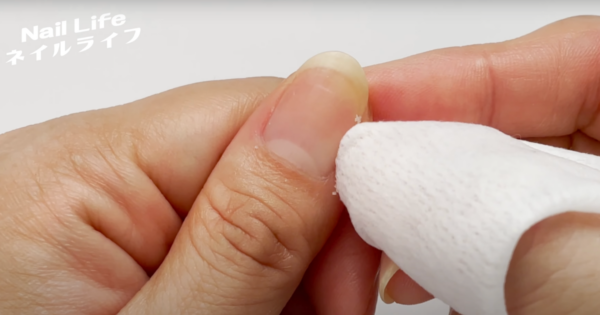
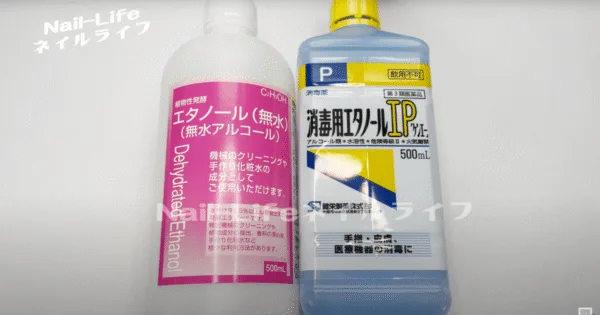
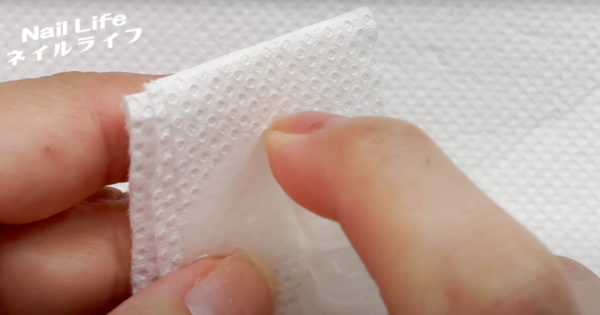
消毒と爪の油分の調整をする。

ジェルを塗る前に爪の油分を調整します。
これもネイルを長持ちさせる方法の1つです。
エタノールで油分調整をすれば、消毒も同時にできるのでおすすめです。
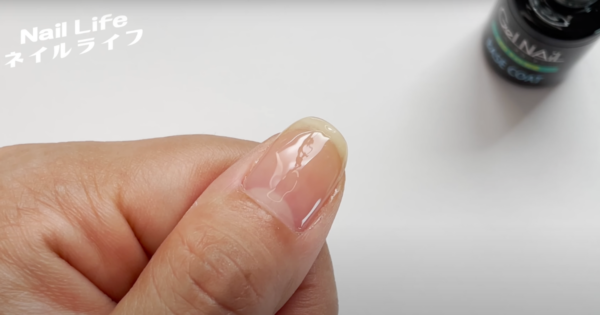
ピールオフジェルを塗る。
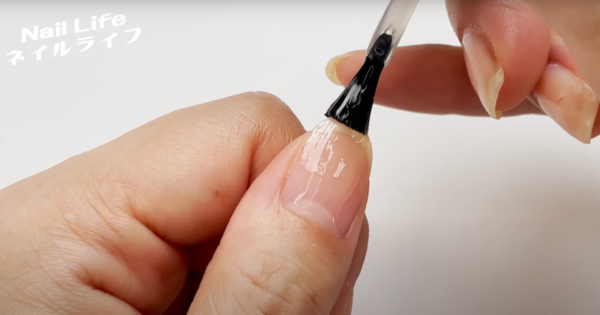
ベースジェルと同じようにピールオフジェルを爪全体に塗ります。
ただし、
爪の断面(エッジ)には、塗らないでください。
🔰羊さんベースジェルは塗る時は、
エッジの部分を塗りますよね?
物知りウサギピールオフジェルの場合、
エッジを塗ると先端からはがれやすくなります。
硬化させる!
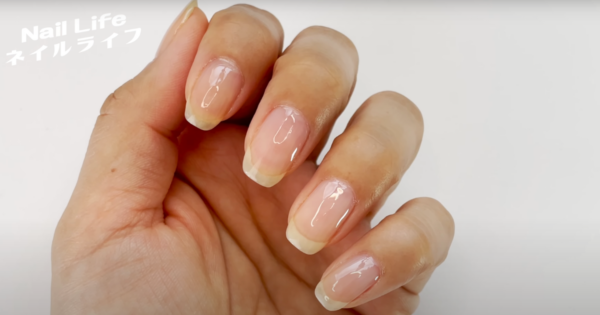
ピールオフジェルを塗り終わったら硬化します。
その後は、いつものようにお好きなカラーやアートをしてトップで仕上げてネイルを完成します。
🔰羊さんほとんど変わりませんね♪
物知りウサギエッジは塗らない!
それだけです。
ピールオフジェルを長持ちさせる方法は?

ネイルを持たせたい日数は、それぞれ違うと思います。
例えば、
ピールオフジェルは硬化してもベースジェルのような強度がありません。
なのでピールオフジェルを塗って硬化した後に
ベースジェルを重ねることで補強になります。
🔰羊さんそれでどれくらいネイルが持ちましたか?
物知りウサギ私は約1週間持ちました。
🔰羊さん私はもっと持たせたいです!
物知りウサギ2週間以上ネイルが保てた
私が試した長持ちさせる方法をご紹介します。
ピールオフジェルを長持ちさせる方法
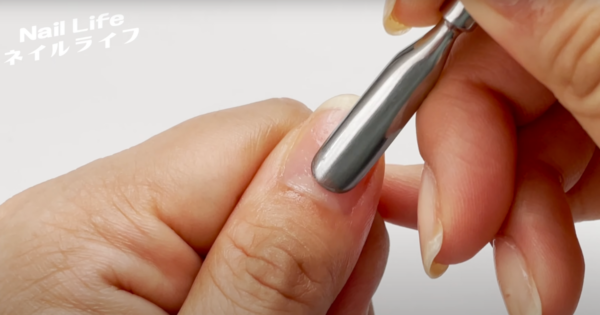
セラミックプッシャーでネイルケア。
メタルプッシャーやキューティクルリムーバーは使わず、
セラミックプッシャーでネイルケアをします。
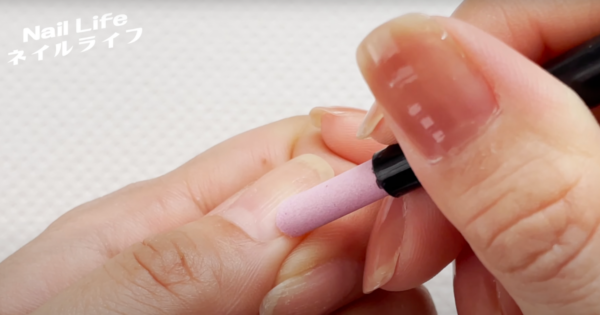
先端が砥石(といし)になっているで力加減を注意しながら
爪についたルーズスキンを削り取ります。
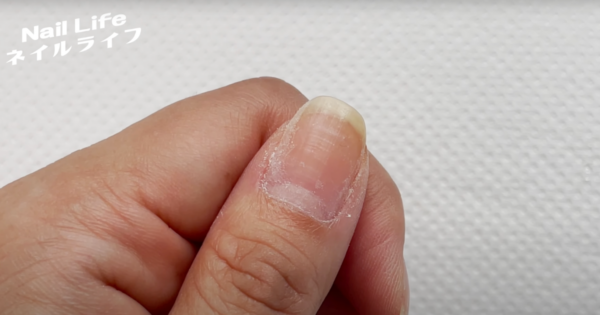
爪のサイド根元ラインの2、3ミリのところをケアしていきます。
そうする事で、ケアと同時に
サイドと根元部分の爪がサンディングした状態になります。

爪の先端も軽くサンディング。
あとは剥がれやすい爪の先端もサンディングします。
爪の先端を1、2ミリくらいの幅をサンディングします。
物知りウサギなので、爪の根元、サイド、先端をサンディングした状態にします。
できたら、削り粉を払い、皮膚と爪の隙間に残った削り粉などを取り除きます。
先ほどと同じようにエタノールを含ませたキッチンペーパーで爪の消毒と油分調整をします。
ピールオフジェルを塗ります。
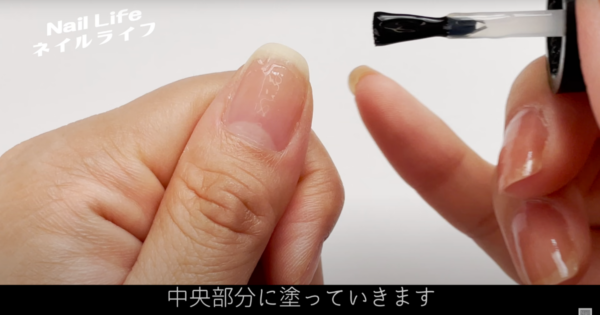
今度は、ピールオフは爪全体に塗りません。
ピールオフジェルは、
爪中央のサンディングをしなかった所に塗ります。
ジェルが塗れたら硬化します。
ベースジェルを塗り重ねる。
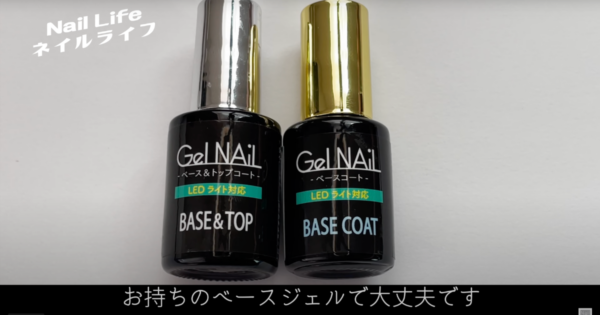 物知りウサギ
ベースジェルはお持ちのもので大丈夫です。
サンディングが必要なベースジェルを使います。

爪全体にベースジェルを塗ります。
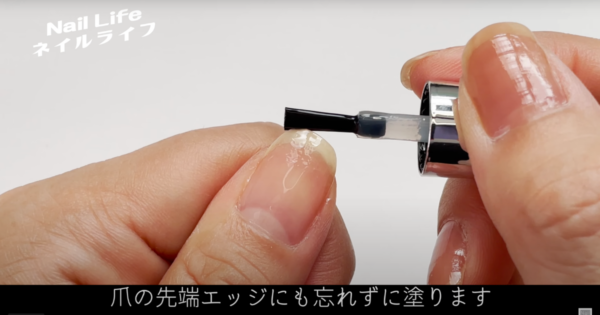
今度は爪の断面も忘れずに塗り、できたら硬化します。
硬化ができたら、
もう一度ベースジェルをを塗り重ねて硬化します。
これで完成!
これでビールオフジェルのもちを良くし たい時のベース作りは完成です!
あとは、お好きなカラーやアートをしてもらえば大丈夫です。
🔰羊さんベースジェルとセラミックプッシャー、
やすりが必要ですね。
物知りウサギ少し、工程が多く感じるかもしれませんが
やってみると簡単です。
ピールオフジェルの長持ちさせる方法を検証しました。
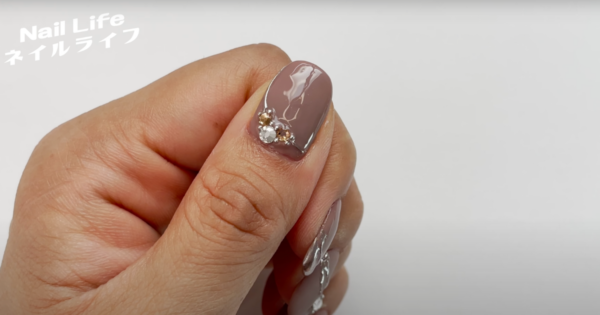
動画ではピールオフジェルの長持ちさせる方法で塗ったベースにデザインをしました。
物知りウサギこのデザインが気になる方はこちらの動画も併せてご覧下さいね
撮影から2週間と4日経った状態がこちら↓
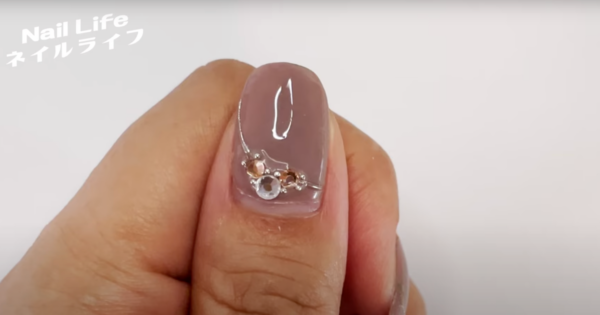
爪の根元部分が伸びているのがわかると思います。
はがれやすい根元やサイド先端もまだまだしっかりと密着しています。
🔰羊さんまだいけそうですね!
物知りウサギこのときは、2週間以上持ちそうでしたよ♪
ピールオフジェルのオフ方法
ピールオフジェルは、アセトンなどの溶剤を使わずにオフができるので
溶剤による爪へのダメージは減ります。
ですが、
無理にはがすのは絶対ダメです!
🔰羊さん痛めないオフの方法が知りたいです。
物知りウサギでは、爪を痛めない
おすすめの方法をご紹介します!
物知りウサギまずは、デンタルフロスピックと…
🔰羊さんデンタルフロスピック?
…ですか?
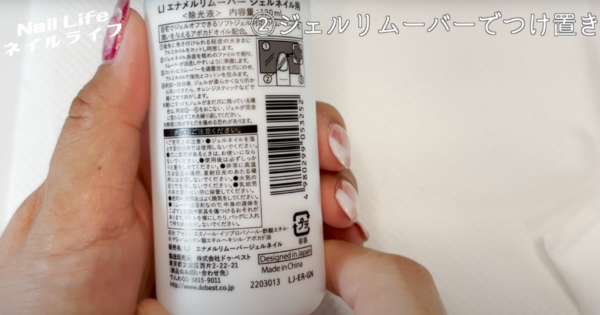
オフで使うアイテム
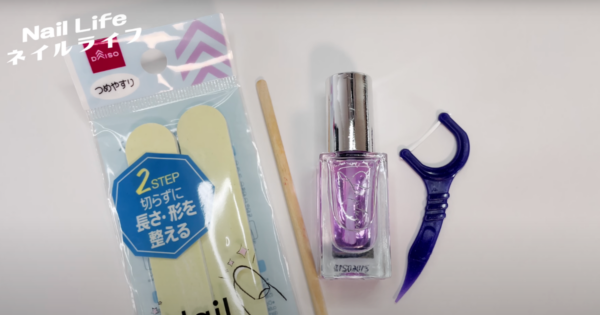
爪を痛めずにピールオフする時に使うアイテムはこちらです。
- やすり
- ウッドスティック
- ネイルオイル
- デンタルフロスピック
以上4つです。
🔰羊さんほとんど、持ってます。
デンタルフロスピック以外は。
物知りウサギデンタルフロスピックは無くても良いですけど、
あると全然違います。
ピールオフのオフ手順
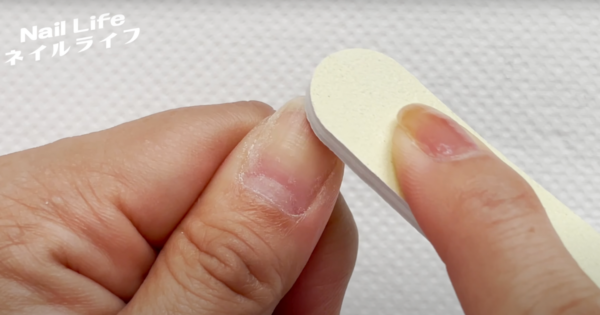
ヤスリで先端を削る。
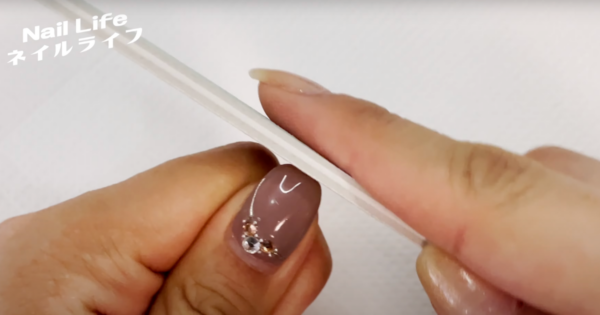
2週間くらい経つと爪も伸びてくるので先端を少し削ります。
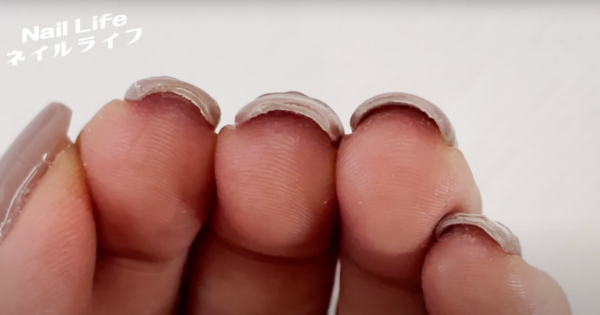
ジェルと爪の層がわかるくらい大丈夫です。
湯につける
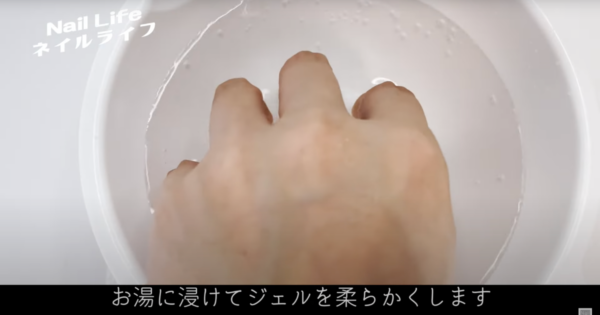
削り粉を払ったら湯につけてジェルを柔らかくします。
その方が爪への負担がかからないです。
物知りウサギちなみに私は、面倒臭い時は
削ってからお風呂でふやかしています。
🔰羊さんわたしもそうする。

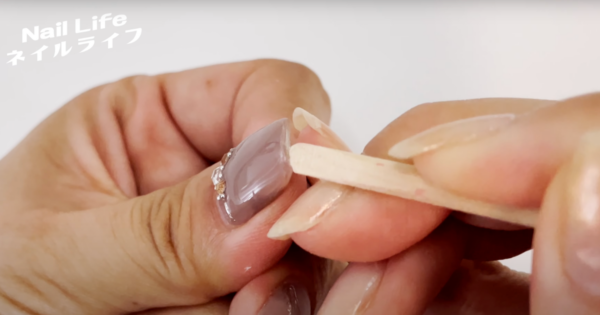
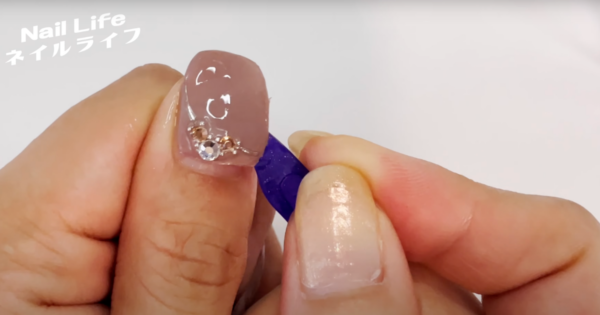
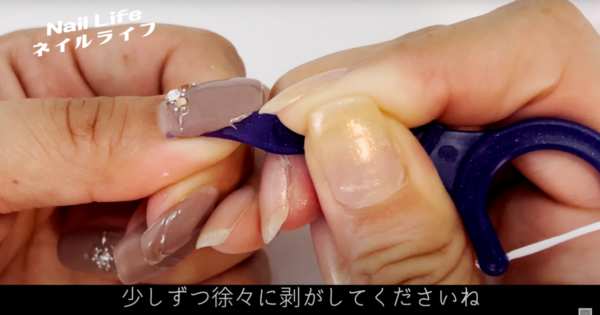
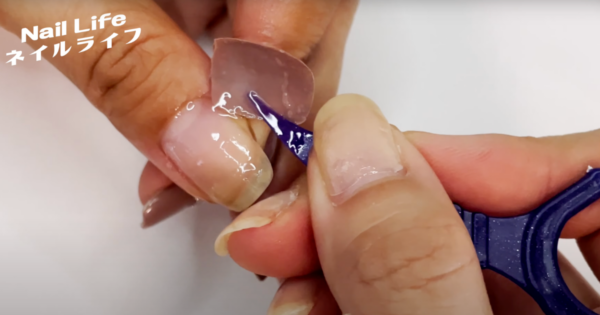
ネイルオイルとデンタルフロスピック
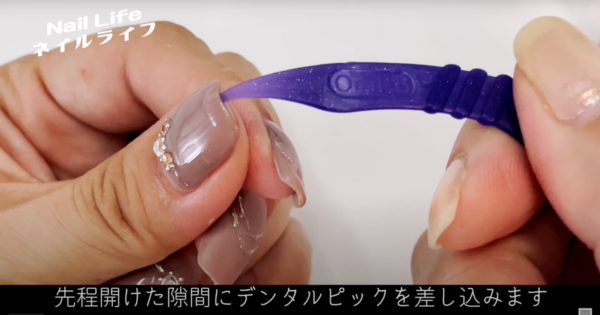
出来た隙間にデンタルフロスを差し込み、
ネイルオイルを潤滑油として少しづつジェルを剥がします。

 物知りウサギ
デンタルフロスピックの薄さが
本当におすすめです♪
 🔰羊さん
🔰羊さん確かに良さそう。
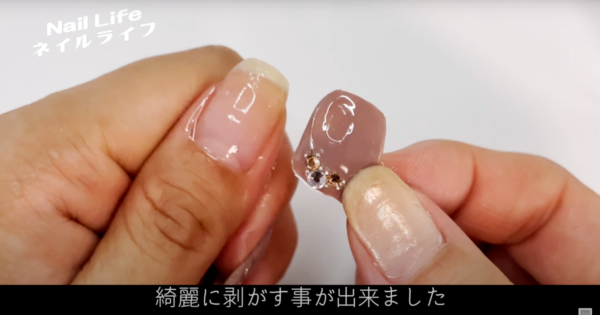
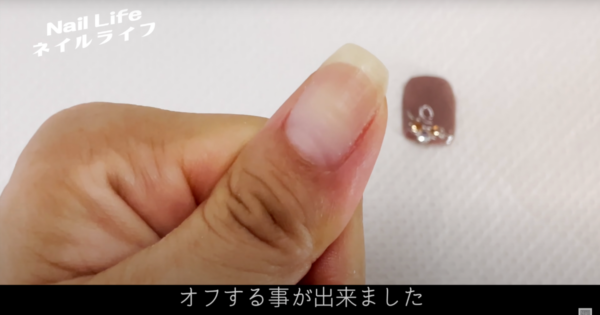
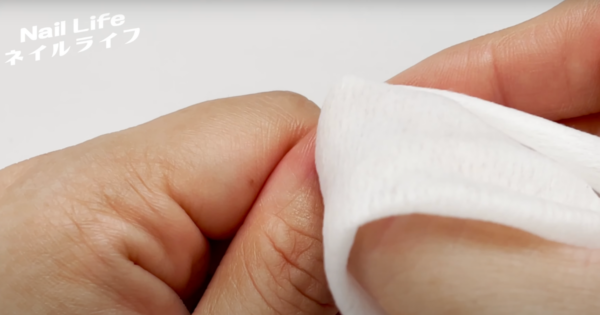
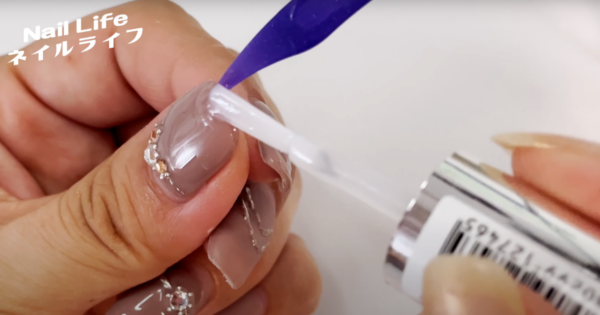
粘着を拭き取る。
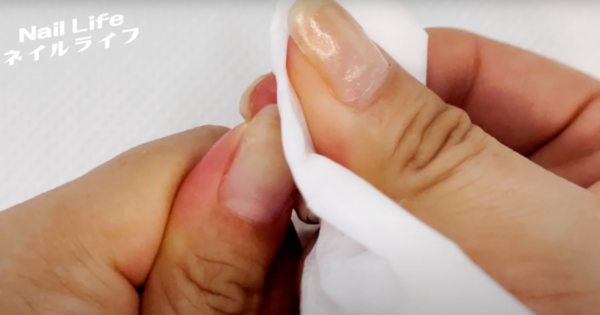
オフした後、ピールオフジェルの粘着が爪に残っているので
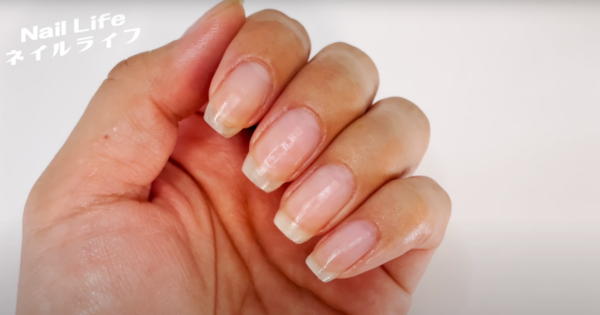
エタノールで拭いてオフの完成です。
物知りウサギオフの方法は以上です。
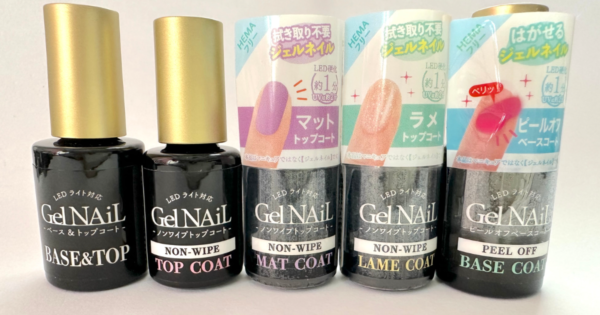
最後におすすめのピールオフジェルをご紹介します。
おすすめのピールオフジェルはコレ。
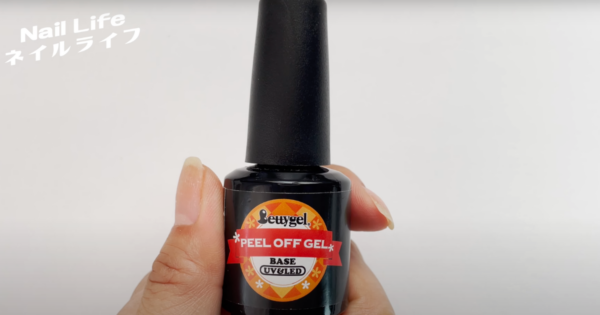
最後におすすめのピールオフジェルは、
プリジェルのベティジェルです。
おすすめの理由は、
ネイルの持ちが良いのに剥がしやすいです。
物知りウサギ剥がした後の粘着も拭き取りやすいので気に入っています。
 🔰羊さん
🔰羊さん動画もチェックしてくださいね。
物知りウサギ最後まで見て頂きありがとうございました。
コメント